🧶 Materials Needed:
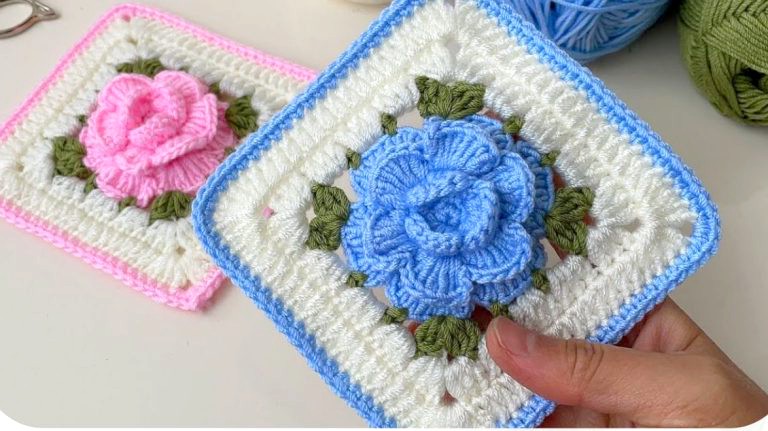
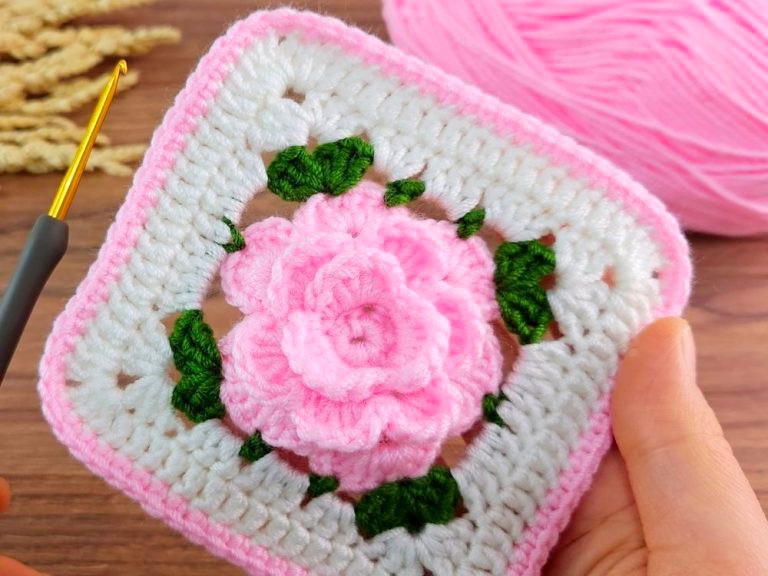
To create this beautiful rose-inspired crochet square, gather the following materials:
- Yarn A: Peony Pink – This will form the core and first few layers of petals.
- Yarn B: Jade – Used for detailing and decorative bobble stitches.
- Yarn C: Peach – Creates the final structural layers.
Special Crochet Stitches Used:
Before starting, familiarize yourself with these specialized stitches that add texture and dimension to your work:
- 3-t-bc (Three-Treble Bobble Stitch): This stitch creates a raised bobble for texture and depth.
- BPsc (Back Post Single Crochet): A post stitch that adds structure by wrapping around the back of a previous round’s stitch.

📌 Step-by-Step Instructions
Round 1: Creating the Center of the Rose
Using Yarn A, form a magic ring and work the following stitches into it:
- Make 6 single crochet (sc) into the ring.
- Close the round by making a slip stitch (sl st) into the first single crochet.
At the end of this round, you should have 6 stitches in total.
Round 2: Forming the Base for the Petals
- Ch 1, then make one sc in the next stitch.
- (Ch 3, skip one stitch, sc in the next stitch.) Repeat this sequence two more times.
- Ch 3 and close the round with a slip stitch in the first sc.
You should now have 12 stitches in total, forming the foundational spaces for the first petal layer.
Round 3: Shaping the First Layer of Petals
- Sl st into the nearest chain space to position your hook for petal work.
- Ch 1, then in the same chain space, work: sc, hdc, 3 dc, hdc, sc (this forms a petal).
- Repeat this petal formation for each chain space around.
- Close the round with a slip stitch in the first sc.
By the end of this round, you should see 6 soft, rounded petals forming. Total stitches: 21.
Round 4: Creating the Base for the Second Petal Layer
(This round is worked behind the petals to provide a foundation for the next layer.)
- Ch 1, then work a BPsc around the hdc of the previous round, ch 3.
- Repeat this sequence 6 times around.
- Join with a sl st in the first BPsc.
At this stage, you’ll have 18 new chain stitches, which serve as the base for the next set of petals.
Round 5: Crafting the Second Layer of Petals
- Sl st into the next chain space to begin.
- (Sc, hdc, 3 dc, hdc, sc) into the same chain space.
- Repeat this sequence 5 more times to form the second petal layer.
- Close the round with a slip stitch in the first sc.
At the end of this round, you should have 42 stitches in total, and your rose will now have two layers of petals.
Round 6: Establishing the Base for the Outer Petals
(Again, working behind the petals to prepare for the final round of petals.)
- Ch 1, then BPsc around the middle dc from Round 5, ch 5.
- Repeat this 6 times around.
- Close with a sl st in the first BPsc.
Now, your piece has 6 post stitches and 30 new chain stitches, forming the foundation for the outermost petal layer.
Round 7: Crafting the Final Petal Layer
- Sl st into the next chain space to position your hook.
- (Sc, hdc, 5 dc, hdc, sc) into the same chain space.
- Repeat this sequence 5 more times for a total of 6 large petals.
- Fasten off using an invisible join for a seamless finish.
By the end of this round, your rose will have three beautifully layered petals, with 54 stitches in total.

🌿 Adding Decorative Details
Now, we’ll introduce Yarn B to add bobble stitches and decorative edging.
Round 8: Creating Bobble Stitch Accents
(Join Yarn B in the middle dc of any petal to begin.)
- Ch 1, work a 3-t-bobble stitch in the same space, then ch 2.
- Between the last dc and the next petal, ch 3, make another 3-t-bobble, ch 2.
- Between the next dc and the next petal, ch 3, make a 3-t-bobble, ch 2.
- Between the last dc and the start of the same petal, ch 3, make a 3-t-bobble, ch 9.
- Repeat this 4 times around.
- Fasten off with an invisible join.
After completing this round, you should see raised bobbles evenly distributed across your work, giving the piece more texture. Total chains: 24.
🧡 Adding the Final Square Shape
Round 9: Defining the Square Edges
(Join Yarn C in any ch-space following a 3-t-bobble after a ch-2 space.)
- Work a dc 2-together in the same space.
- Continue with dc stitches in the next ch-2 spaces, then ch 2.
- Ch 3 in each of the next two chain spaces.
- Work 3 hdc into each of the next two chain spaces.
- Ch 3, work 2 hdc in the next chain space.
- In the next chain space, create a corner: 3 dc, 3 hdc, 3 dc.
- In the next space, work 5 hdc.
Repeat this sequence to form a square shape around the floral design.

VIDEO TUTORIAL:
We have carefully curated two exceptional video tutorials exclusively for you, esteemed viewer. Please immerse yourself in the following visual lessons:
✨ Final Touches
Once the square shape is formed, fasten off and weave in all loose ends neatly. Block the finished piece if needed to ensure even edges and a clean, polished look.
This Rose Square motif can be used in blankets, pillow covers, or as an elegant standalone piece for various crochet projects. 🌷


