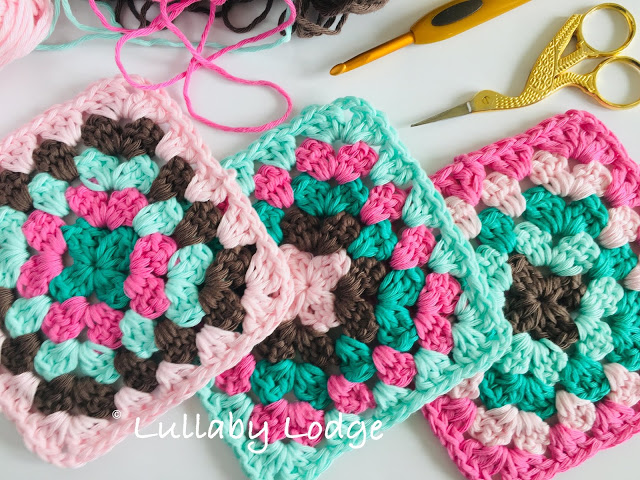
How to Make the Perfect Granny Square (Without Twisty Corners)
Granny squares are one of the most iconic crochet motifs, perfect for blankets, scarves, bags, and more. However, many crocheters struggle with their granny squares becoming wonky, twisted, or misshapen. If your squares don’t lie flat or your corners seem to lean, don’t worry! This guide will help you make perfectly balanced granny squares with crisp, even corners every time.

Materials Needed
Before you start, gather the necessary supplies:
- Yarn: Worsted weight yarn (or your preferred yarn)
- Crochet Hook: Use the recommended size for your yarn (typically 5mm or 6mm for worsted weight)
- Scissors: For trimming yarn ends
- Yarn Needle: For weaving in ends
- Stitch Marker (optional): Helps maintain alignment
Step-by-Step Instructions
Step 1: Make the Center Ring
There are two main ways to start your granny square:
-
Magic Ring (Preferred Method):
- Make a loop with your yarn, leaving a short tail.
- Insert your hook into the loop, yarn over, and pull up a loop.
- Chain 1 to secure the ring.
-
Chain 4 and Join (Alternative Method):
- Chain 4, then slip stitch into the first chain to form a small loop.
Step 2: Round 1 – Forming the First Corner Clusters
-
Begin the First Corner:
- Chain 3 (counts as first double crochet).
- Work 2 double crochets (DC) into the center ring.
- Chain 2 (this forms the corner).
-
Continue the Round:
- Work 3 DC, chain 2 three more times into the center ring.
- You should now have four groups of three double crochets, each separated by chain-2 spaces.
-
Join and Close the Round:
- Slip stitch into the top of the starting chain-3.
- Pull the magic ring tight if using one.
Step 3: Round 2 – Expanding the Square
-
Position Your Hook for the Next Round:
- Slip stitch across the next two stitches until you reach the first chain-2 corner space.
- Chain 3 (counts as first double crochet).
-
Work the First Corner:
- Into the same chain-2 space, work (2 DC, chain 2, 3 DC).
-
Work the Sides:
- In the next chain-2 corner space, work (3 DC, chain 2, 3 DC).
- Repeat this for all corners.
-
Close the Round:
- Slip stitch into the top of the beginning chain-3.
Step 4: Round 3 and Beyond – Keeping It Square
For each additional round, follow this pattern:
- Slip the stitch into the corner space to start.
- Chain 3 (counts as the first DC).
- In each corner space, work (3 DC, chain 2, 3 DC).
- In each side space (between corners), work 3 DC.
- Continue around and join with a slip stitch at the end of the round.
Tips to Avoid Twisty Corners and Wonky Squares
1. Turn Your Work After Every Round
One of the main reasons granny squares twist is because all stitches are worked in the same direction. To fix this, simply turn in your work at the start of each new round. This balances out the natural lean of crochet stitches.
How to do it:
- When you finish a round, instead of slip stitching forward into the corner, flip your work to the opposite side.
- Begin the next round in the nearest corner space.
This technique keeps your square from skewing and ensures straight edges.
2. Maintain Even Tension
Uneven stitches cause the square to look misshapen. Make sure to:
- Avoid pulling stitches too tight or making them too loose.
- Keep a relaxed grip on your yarn and hook.
- If your square feels tight or stiff, try using a larger hook.
3. Use a Stitch Marker for Alignment
Place a stitch marker in a corner space or the first stitch of each round. This helps track where your rounds begin and prevents your square from tilting.
4. Keep Your Corner Chains Consistent
For a clean square shape, always use chain 2 in the corners. More than 2 chains can create gaps, while only chaining 1 can make corners too tight.
5. Block Your Square for a Perfect Finish
Blocking is a great way to shape your granny square.
How to block your square:
- Gently stretch and pin the square onto a blocking board or foam surface.
- Spray it lightly with water or steam.
- Let it dry completely before removing the pins.
This technique evens out stitches and ensures a professional finish.
Troubleshooting Common Issues
| Problem | Cause | Solution |
|---|---|---|
| Square is twisting | Working rounds in the same direction | Turn your work after each round |
| Corners look messy | Uneven tension or incorrect chain count | Keep chains consistent and use a stitch marker |
| Sides are wavy | Too many stitches along the edges | Check that you’re only working 3 DC per side space |
| Square isn’t lying flat | Tension issues or too many stitches | Adjust hook size or block your square |
Final Thoughts
By following these steps and tips, you’ll create a perfect granny square that lies flat and has neat, crisp corners. Whether you’re making a single square or joining multiple for a blanket, mastering this technique will give your crochet projects a professional and polished look.
Would you like additional guidance on joining granny squares or adding decorative borders? Let me know! 😊


