
🧶 MATERIALS
Yarn:
-
Worsted weight yarn (Category 4)
-
3 colors recommended:
-
Color A – Flower center
-
Color B – Petals
-
Color C – Background/square
-
Hook:
-
Size H/8 (5.0 mm), or size needed for your yarn
Notions:
-
Yarn needle for weaving in ends
-
Scissors
-
Stitch markers (optional)
🪡 STITCHES & ABBREVIATIONS (US Terminology)
-
ch – chain
-
sl st – slip stitch
-
sc – single crochet
-
dc – double crochet
-
tr – treble crochet
-
sp – space
-
st(s) – stitch(es)
-
sk – skip
🌼 PATTERN INSTRUCTIONS
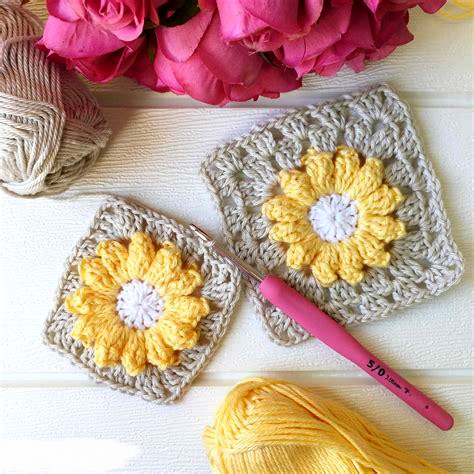
🌸 ROUND 1: Flower Center (Color A)
-
Start with a magic ring, or alternatively:
-
Ch 4, sl st into first ch to form a ring.
-
-
Ch 3 (counts as first dc), then work 11 dc into the ring.
-
Sl st to top of beginning ch 3 to join.
→ You should have 12 dc total (including the starting ch-3).
Fasten off Color A.
🧵 Tip: Pull the tail to tighten the magic ring securely.
🌸 ROUND 2: Flower Petals (Color B)
-
Attach Color B with a sl st to the top of any dc from Round 1.
-
For each petal:
(Ch 2, tr, ch 2, sl st) all in the same DC. -
Repeat this petal stitch in each of the 12 dc around.
→ You’ll have 12 petals, each worked into a dc from Round 1. -
Sl st to the base of the first pedal to finish the round.
Fasten off Color B.
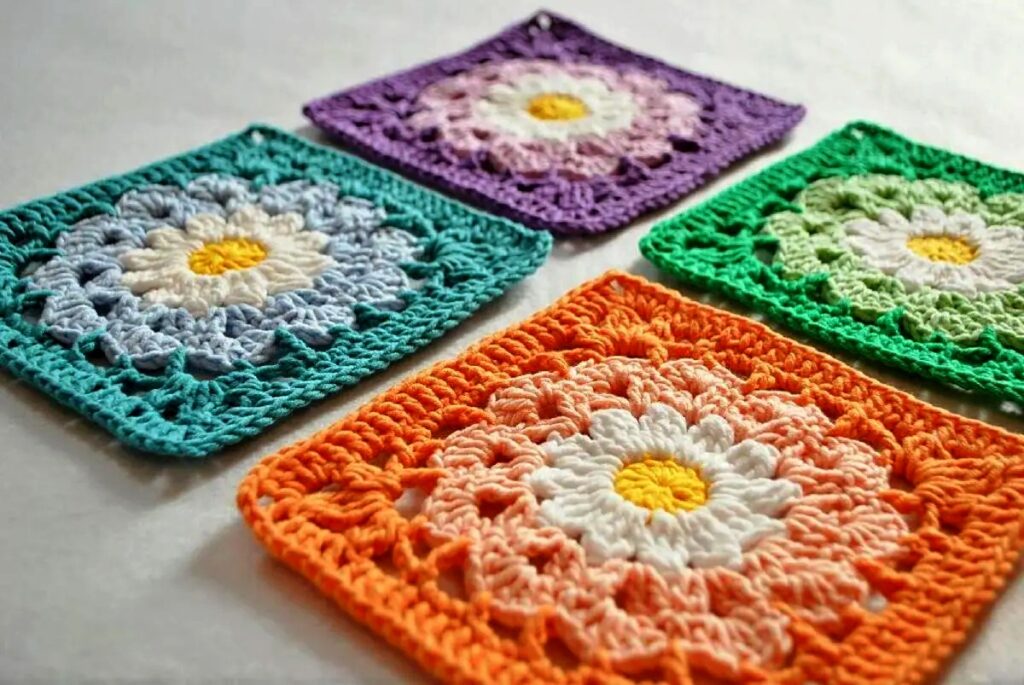
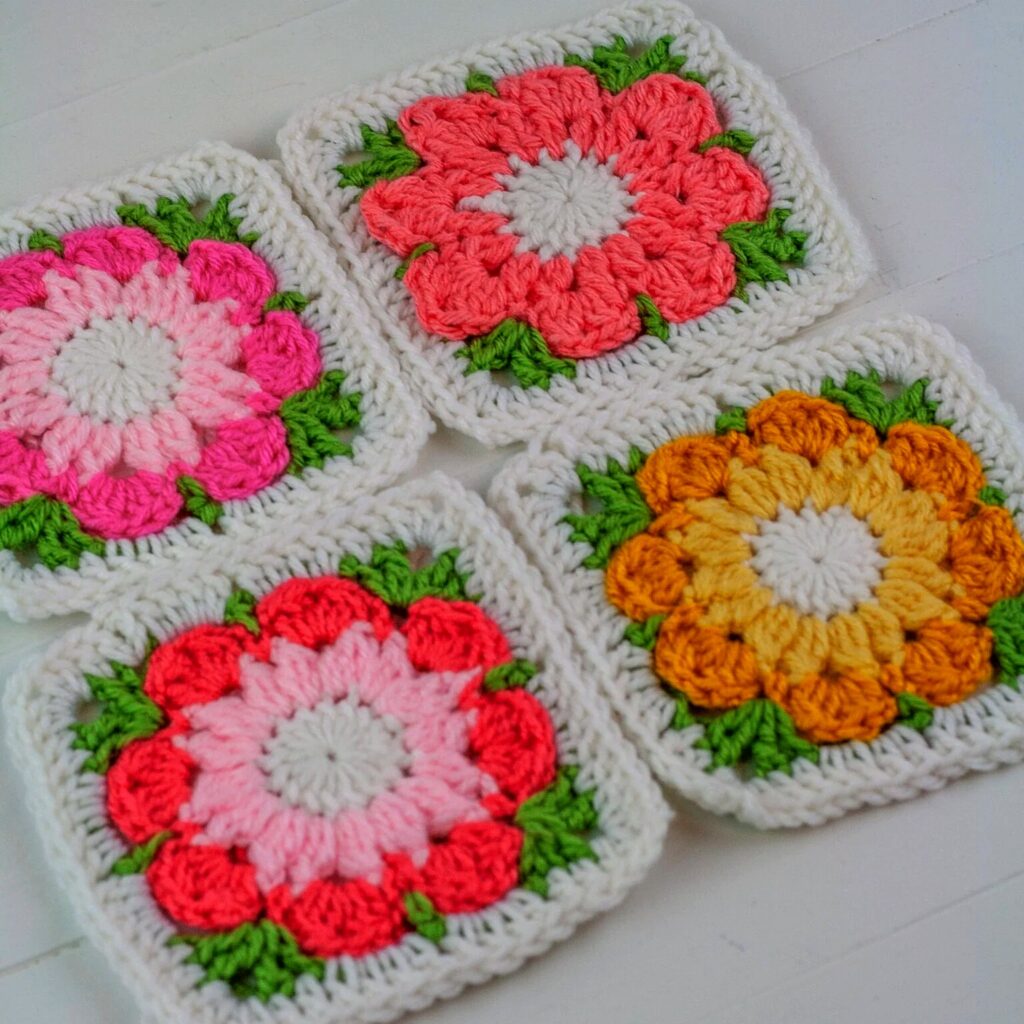
🧵 Note: Your flower should now look like a daisy with a round center and 12 delicate petals.
🟩 ROUND 3: Turn Flower into a Square (Color C)
Now you’ll start building the square shape around the flower.
-
Join Color C in the space between two petals (not in the stitches themselves, but in the gap between the petal bases).
-
Ch 3 (counts as first dc), work 2 dc in same sp.
-
In the next 2 spaces, work 3 dc in each.
-
In the 4th space (which will become a corner), work:
(3 dc, ch 2, 3 dc). -
Repeat steps 2–4 three more times:
-
3 dc in next 3 spaces,
-
Corner: (3 dc, ch 2, 3 dc)
-
-
You’ll now have a square with 4 corners and 4 sides.
-
Sl st to the top of the beginning ch-3 to close the round.
🧵 You now have the basic flower granny square shape!
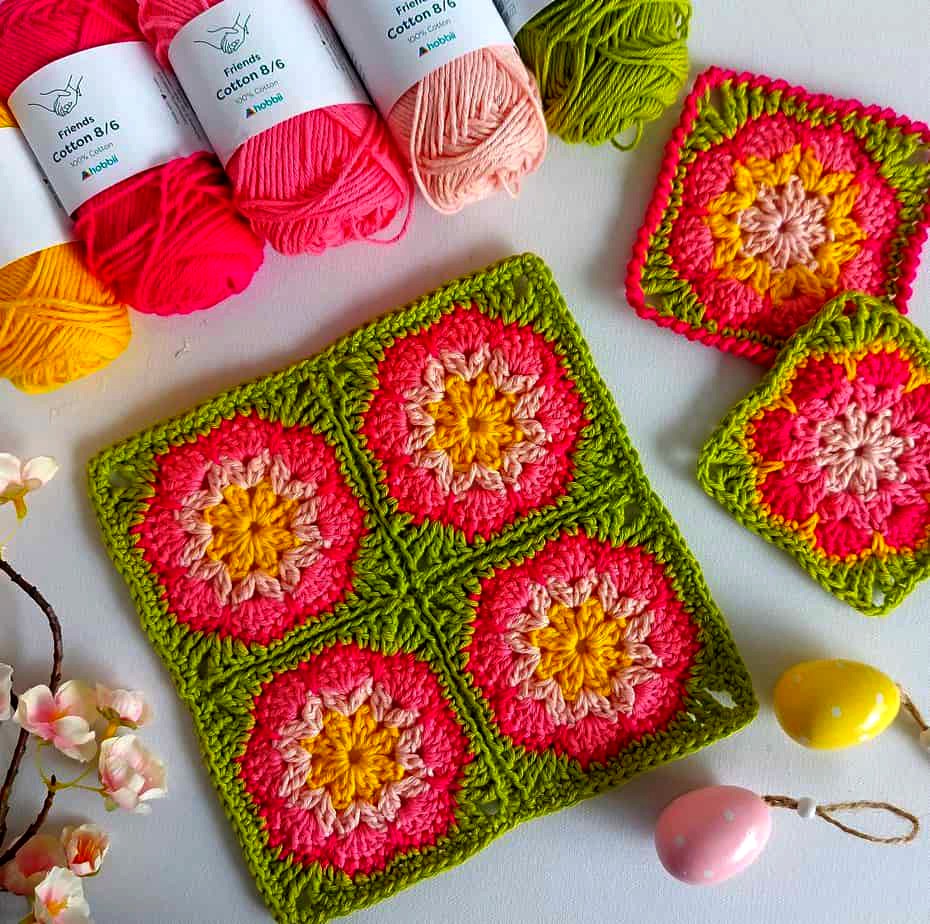
⬛ ROUND 4: Continue Square (Optional for Larger Square)
-
Sl st to the corner ch-2 space.
-
Ch 3 (counts as dc), work (2 dc, ch 2, 3 dc) in the corner.
-
Along the side:
-
Work 3 dc into each space between clusters from the previous round.
-
-
In the next corner, ch-2 sp, repeat:
(3 dc, ch 2, 3 dc). -
Continue this pattern all the way around:
-
3 dc in each space between clusters
-
Corners: (3 dc, ch 2, 3 dc)
-
-
Join with a sl st to the top of the beginning ch 3.
Repeat this round if you want an even larger square – keep adding rounds until the square reaches the desired size.
🧶 FINISHING OFF
-
Fasten off and weave in all yarn tails with a yarn needle.
-
Steam or wet block squares to flatten and shape before joining.
💡 JOINING METHODS
Once you have multiple squares, you can join them using a few different methods:
-
Whip Stitch (using yarn needle) – Invisible, neat, good for flat joins.
-
Slip Stitch Join – Place squares right sides together and sl st through back loops only.
-
Join-As-You-Go (JAYGO) – Attach new squares to existing ones while crocheting the last round.
🎨 CUSTOMIZATION TIPS
-
Use variegated yarn for the petals to create a multicolored floral effect.
-
Make every flower different for a “wild garden” look.
-
Try using puff stitches instead of treble crochets for thicker petals.
-
You can make larger flowers by increasing the number of petals (e.g., 16 dc in Round 1 for 16 petals in Round 2).
-
Turn these squares into bags, pillows, shawls, or coasters.
🛏️ PROJECT IDEAS
-
Blanket/Throw: Create dozens of squares, then arrange them in rows.
-
Bag or Purse: Make 10–12 squares, join and add a strap.
-
Pillow Cover: Join 4 large squares for the front, 4 for the back.
-
Wall Hanging: Line up colorful squares and attach them to a wooden dowel.
Video Tutorial:
Certainly! If you’re looking for a visual guide to crafting a crochet flower granny square, here are some excellent video tutorials to assist you:
How to Crochet a Daisy Granny Square | Step by Step | US Terms
-
This beginner-friendly video offers a comprehensive walkthrough of creating a daisy granny square using US crochet terms. By Adore Crea Crochet channel
- Watch here:
Crochet Flower Granny Square Tutorial
-
This tutorial provides clear instructions on crocheting a flower granny square, complete with a printable pattern for your convenience. By VivCrochets channel
-
Watch here:
Daisy Granny Square Crochet Tutorial
-
Learn to crochet a daisy granny square with this easy-to-follow guide, suitable for beginners aiming to enhance their skills. By Melanie Ham channel
-
Watch here:
These videos should provide you with the visual guidance needed to create your crochet flower granny squares successfully. Happy crocheting! 🧶🌸