Crochet Apache Tears: A Complete Guide for Beginners
Crochet is a relaxing and creative way to express yourself, and the Apache Tears pattern is one of the most charming and beginner-friendly designs to try. If you’re looking for a project that’s easy to learn yet creates a beautiful, textured fabric, then the Apache Tears crochet pattern is perfect for you! This guide will take you step-by-step through the process of creating your very own Apache Tears crochet piece, whether it’s a blanket, shawl, scarf, or any other creative project you have in mind.
What is Apache Tears?
The Apache Tears crochet pattern gets its name from the unique, tear-shaped holes that form between stitches. This simple yet striking design can create a lacy effect that works beautifully for many different types of projects. It’s made using basic crochet stitches, making it a fantastic project for beginners who are just starting to explore the world of crochet.
Materials You Will Need:
Before starting your Apache Tears crochet project, gather the following materials:
- Yarn: Choose a yarn that is soft and easy to work with. Worsted-weight yarn is ideal for this pattern as it provides structure without being too heavy. You can experiment with different textures or colors depending on your design preferences.
- Crochet Hook: Use a crochet hook that matches your yarn size. Typically, a 5.0mm (H-8) hook is a great choice for worsted-weight yarn, but you can always check the yarn label for specific recommendations.
- Scissors: For trimming your yarn once you’re finished with each piece.
- Tapestry Needle: A tapestry needle is essential for weaving in ends and joining pieces together if necessary.

Step-by-Step Guide to Crocheting Apache Tears
Ready to begin? Grab your yarn, and hook, and let’s dive into the process of crocheting Apache Tears. Follow these simple steps to create this lovely pattern.
Step 1: Make a Slip Knot
The first step in every crochet project is to create a slip knot. To do this:
- Make a loop with the yarn by folding the yarn into a “U” shape.
- Pull the working yarn through the loop.
- Slide the knot onto the crochet hook, making sure it’s snug but not too tight, as you want your stitches to move easily.
Step 2: Create the Foundation Chain
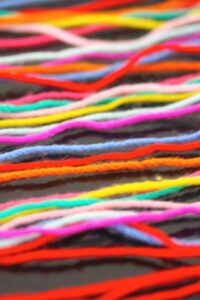
The foundation chain sets the base for your pattern, and the length depends on the size of your project. For this pattern, we’ll start with a chain of 26 stitches:
- Chain 26 stitches using your crochet hook. This chain will determine the width of your project.
- Make sure that your chain is neither too tight nor too loose. A consistent tension will help ensure that your work stays even and smooth as you progress.
Step 3: Double Crochet the Base
Once your chain is ready, you’ll move on to the first row of double crochet stitches. Double crochet (DC) is one of the most basic crochet stitches, so it’s perfect for beginners:
- Skip the first three chains (this counts as the height of the first double crochet stitch).
- Insert your hook into the fourth chain from the hook.
- Yarn over and pull through the chain (you will have three loops on your hook).
- Yarn over again and pull through the first two loops on the hook.
- Yarn over once more and pull through the last two loops on the hook, completing your first double crochet stitch.
Repeat this process for each of the remaining chains. When you’re finished, you should have 24 double crochet stitches. This forms your base row for the Apache Tears pattern.
Step 4: Start Apache Tears Pattern
Now that you have your base row completed, it’s time to start the Apache Tears design:
- Begin by chaining 5 stitches.
- Skip 2 double crochet stitches from the base row.
- Insert your hook into the third double crochet stitch and single crochet.
- Chain 5 stitches again, skip 2 double crochet stitches, and single crochet into the third double crochet stitch.
- Continue this process across the entire row: Chain 5, skip 2 stitches, and single crochet into the third stitch.
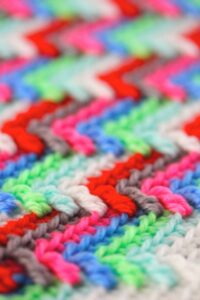
By the end of the row, you’ll have created small, tear-shaped gaps in your work, which are the hallmark of the Apache Tears design. This pattern will create spaces between the stitches that resemble “tears,” hence the name.
Step 5: Complete the Row
To finish this row:
- After you’ve completed the pattern, you will end the row with a double crochet in the last stitch of the base row. This will help to even out the edge of your work and keep your stitches consistent.
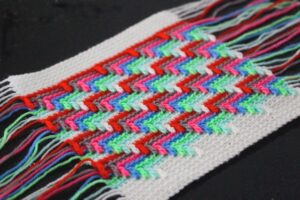
You’ve now completed one row of Apache Tears! This marks a critical point where your design starts to take shape. The small “tears” created by the gaps give a lacy look to your crochet fabric, which is both decorative and lightweight.
Step 6: Repeat the Pattern
Now it’s time to repeat the pattern to build up the design:
- For each new row, begin by chaining 5 stitches.
- Skip 2 double crochets from the previous row, and single crochet into the third stitch.
- Continue this process across the row until you reach the end, making sure to finish with a double crochet in the last stitch.
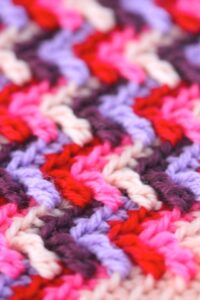
Repeat this process for as many rows as you like, depending on the size of your project. You can experiment with different colors by changing yarn after each row, or continue in the same color for a more consistent look.
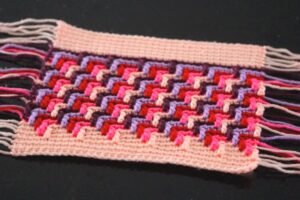
Customizing Your Apache Tears Crochet Project
One of the best things about crochet is the ability to customize it to suit your tastes. Here are some ideas for customizing your Apache Tears design:
1. Experiment with Colors
Adding color to your Apache Tears project can make it even more striking. You could change colors every few rows to create a striped effect or go for a more gradient look. Some people even add variegated yarn, which creates a beautiful blend of colors without having to manually change the yarn.
2. Adjust the Size
You can easily adjust the size of your Apache Tears project by changing the foundation chain length or the number of rows you work. For example, to make a smaller piece, use a shorter foundation chain, or to make a larger piece, add more rows.
3. Combine with Other Patterns
Apache Tears can be combined with other crochet patterns to create more complex designs. For example, add a border around your Apache Tears piece or use it as part of a larger blanket or shawl design. You can combine Apache Tears with other textured or lacy crochet patterns to create visually interesting and unique projects.
4. Use Different Yarn Types
Apache Tears looks great with different yarns, so feel free to experiment with different textures. Try using soft cotton yarn for a lightweight summer scarf or use wool for a cozy winter shawl. The type of yarn you choose will affect the overall look and feel of your project.

Troubleshooting Tips
Like any crochet project, you may encounter a few challenges. Here are some common issues and tips on how to fix them:
-
Uneven Tension: If your stitches are too tight or loose, your work may not look uniform. Try


