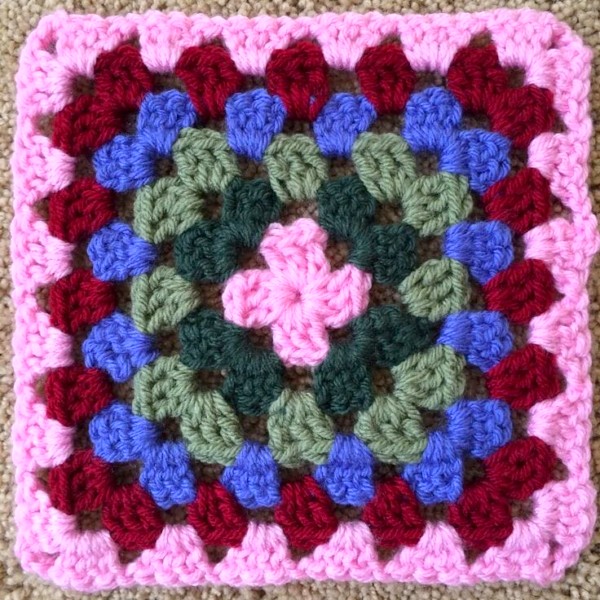
The classic granny square is one of the most well-known and beloved crochet motifs. It’s simple, versatile, and easy to customize, which makes it ideal for beginner crocheters as well as experienced crafters looking for a relaxing project. You can make them in solid colors or multiple shades and join them together to make beautiful blankets, scarves, bags, and more.
🧵 Materials You Will Need:
-
Yarn: A medium-weight yarn (commonly labeled as “worsted weight” or “category 4”) works well. You can use a single color or mix and match multiple colors for a more vibrant look.
-
Crochet Hook: Size H/8 (5.0 mm) is a standard choice for worsted weight yarn, but always check your yarn label and use a hook that matches the suggested gauge.
-
Yarn Needle: For weaving in ends after you finish your square.
-
Scissors: To cut your yarn between color changes or at the end of your project.
✨ Before You Start – Understanding the Basics:
This pattern uses U.S. crochet terminology. Here are the basic stitches and techniques you’ll need to know:
-
Slip Knot – The way to start most crochet projects.
-
Chain (ch) – A foundational stitch.
-
Slip Stitch (sl st) – Used to join rounds.
-
Double Crochet (dc) – The main stitch in granny squares.
-
Chain Spaces (ch-sp) – Spaces created by chains, usually in the corners or between stitch groups.
🔄 Step-by-Step Instructions:
🟨 Round 1: Creating the Foundation Ring and First Corners
-
Begin by making a slip knot on your hook.
-
Chain 4. This will create the start of your center ring.
-
Insert your hook into the first chain you made, and join with a slip stitch to form a small ring. This is where you’ll be crocheting your first stitches.
-
Now, chain 3 – this counts as your first double crochet.
-
Into the ring, work 2 double crochets. You now have a group of 3 double crochets, which form the first “shell.”
-
Chain 2 – This forms the first corner.
-
Into the ring again, work 3 double crochets (your second shell), then chain 2 (second corner).
-
Repeat this sequence two more times: (3 double crochets, chain 2).
-
You should now have four groups of 3 double crochets, each separated by a chain-2 corner.
-
Join to the top of the starting chain-3 using a slip stitch to close the round.
👉 At this point, your piece should resemble a small square with open corners.
🟨 Round 2: Building on the Corners
-
If you are changing colors, fasten off the yarn and join the new color in any chain-2 corner space by making a slip knot and pulling it through the space with your hook.
-
Begin the round by chaining 3 (this will again count as your first dc).
-
In the same corner space, work 2 double crochets, chain 2, and 3 more double crochets. This creates a new corner.
-
Move to the next corner space. In that space, work 3 double crochets, chain 2, 3 double crochets.
-
Repeat this in the remaining two corners.
-
You should now have four corners, each consisting of 2 sets of 3-dc clusters separated by chain-2 spaces.
-
Join with a slip stitch to the top of the beginning chain-3 to close the round.
👉 Notice how your square is getting larger and the corners are more defined.
🟨 Round 3: Adding Side Clusters
-
Start in any corner space, either with the same yarn or by joining a new color with a slip knot.
-
Chain 3 (counts as dc), then 2 double crochets in the same space, chain 2, and 3 more double crochets – just like before, this creates your corner.
-
Now, before reaching the next corner, you’ll come to a space between two groups of double crochets from the previous round. This is called a side space.
-
In that side space, work 3 double crochets – no chains needed on the sides.
-
Continue around: in each corner space, work (3 dc, ch 2, 3 dc), and in each side space, work 3 dc.
-
After finishing the final side, join to the beginning ch-3 with a slip stitch.
👉 Now your square is growing not just at the corners, but also along each side!
🟨 Rounds 4 and Beyond: Repeat the Pattern
As you continue to grow your granny square, the process remains the same:
-
In each corner space, always work (3 dc, ch 2, 3 dc).
-
In each side space, always work 3 dc.
-
Continue joining at the end of each round and start the next round in a corner.
You can keep going until the square reaches your desired size.
🧹 Finishing Touches:
-
When you’re happy with the size of your square, finish your final round by joining with a slip stitch.
-
Cut the yarn, leaving a tail of several inches.
-
Pull the tail through the loop on your hook and gently tighten to fasten off.
-
Use your yarn needle to weave in all loose ends on the back side of your work.
🌈 Optional Variations and Tips:
-
Change colors every round for a traditional multi-colored look.
-
For a solid-color square, simply continue with the same yarn without fastening off.
-
Block your squares if they start to curl or look uneven – pin them to shape and lightly steam with an iron or spray with water.
-
Join multiple granny squares together to make:
-
Blankets
-
Scarves
-
Bags
-
Pillow covers
-
Clothing (sweaters, vests, etc.)
-
📏 Sizing Guide (Approximate):
-
With worsted weight yarn and a 5.0 mm hook:
-
3 rounds = about 4 inches square
-
5 rounds = about 6 inches square
-
8 rounds = about 10 inches square
-
(Your size may vary depending on your yarn, hook, and tension.)
Video Tutorial:
Certainly! Here are some excellent YouTube tutorials to help you learn how to crochet a classic granny square:
-
Classic Granny Square Tutorial
This video provides a step-by-step guide on crocheting a classic granny square, making it perfect for beginners. By Cherry Heart Channel
-
Learn How to Crochet the Granny Square
This tutorial walks you through the process of creating a classic granny square, offering clear instructions for each step. By Just Be Crafty Channel
-
How to Crochet a Granny Square for Absolute Beginners
Ideal for those new to crochet, this video breaks down the basics of making a granny square in an easy-to-follow manner. By Bella Coco Channel
Feel free to choose the tutorial that best suits your learning style. Happy crocheting!