
Skill Level: Confident Beginner – Intermediate
Finished Size: Approx. 36″ x 36″ (adjustable)
Yarn Weight: Medium (Worsted / Aran)
Hook Size: 5.5mm (I-9) crochet hook
Yarn Needed:
-
Main Colour (White): approx. 700g
-
Contrast Colour (Pink): approx. 250g
STITCH KEY (in UK terms)
-
ch – chain
-
dc – double crochet (US single crochet)
-
tr – treble crochet (US double crochet)
-
fptr – front post treble crochet
-
bptr – back post treble crochet
-
sl st – slip stitch
(Note: If you prefer US terms, let me know and I’ll translate the whole thing.)
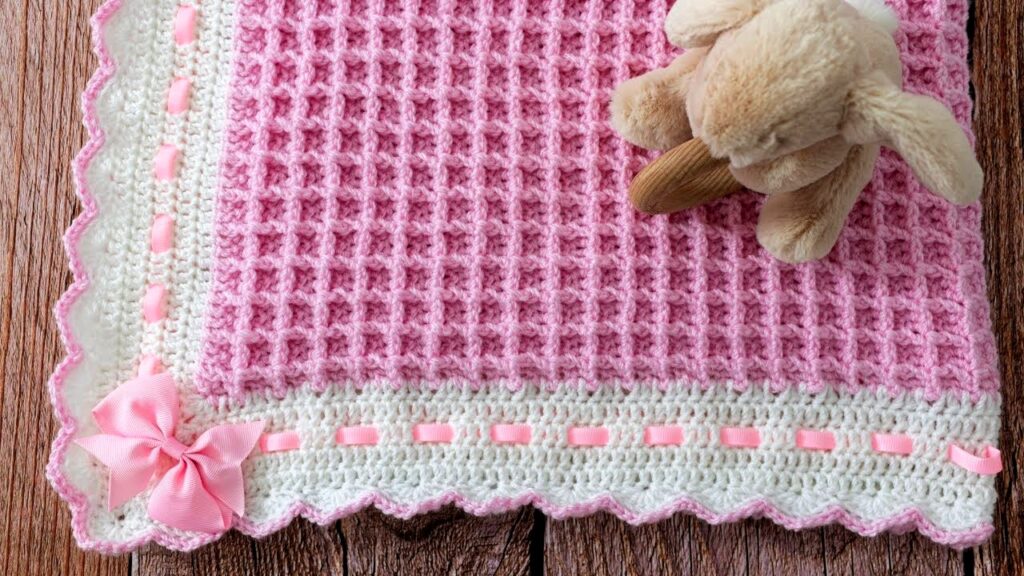
SECTION 1: WAFFLE STITCH BLANKET BODY
Foundation Row
-
Ch is a multiple of 3 + 2. (For a 36” blanket, ch 122 is a good start.)
-
Row 1: Tr in 3rd ch from hook and in each across. Turn.
Row 2 (Start of Waffle Pattern)
-
Ch 2 (counts as first tr), fptr around next stitch, tr in next two sts; repeat from * to end. Turn.
Row 3:
-
Ch 2, tr in next stitch, fptr around next two sts; repeat from * to end. Turn.
Repeat Rows 2 and 3 until your piece is square or the desired size. Finish after a Row 3 repeat.
Tie off and weave in ends.
SECTION 2: RIBBED & RUFFLED BORDER
Switch to contrast yarn (Pink).
Round 1 – Base Border Round
-
Join yarn anywhere on the edge with a slip stitch.
-
Ch 1, dc evenly all around the blanket (place 3 dc in each corner). Join with sl st to the first dc.
Round 2 – Ribbed Section
-
Ch 3 (counts as first tr), fptr in next stitch, bptr in next; repeat around.
-
Work 3 sts into the corner stitch to maintain the shape.
-
Join with sl st to top of beginning ch-3.
Repeat Round 2 twice more for a deeper ribbed effect (adjust based on how thick you want that rib).
Round 5 – Ruffled Edging
Here’s where it gets fun and frilly.
-
Ch 3, 5 tr into next stitch, sl st into next; repeat all the way around.
-
You can modify the fullness of the ruffle by doing 4 tr or 6 tr per cluster — more tr means more ruffle.
Finish off and weave in all ends.
SECTION 3: CROCHET BOW APPLIQUÉ
Bow Body:
-
Ch 25.
-
Row 1: Dc in 2nd ch from hook and across. Turn.
-
Row 2–4: Dc across. Fasten off, leaving a long tail.
Bow Centre Wrap:
-
Ch 6.
-
Row 1: Dc in 2nd ch and across.
-
Row 2–3: Dc across. Fasten off.
Assembly:
-
Fold the bow body accordion-style and wrap the smaller rectangle around the centre.
-
Stitch in place securely.
-
Sew onto one corner of the blanket, or wherever you fancy it!
Finishing Touches
-
Block the blanket lightly (especially if using acrylic yarn, steam block only – no iron to direct contact).
-
If it’s a gift, consider tying a ribbon around it or tucking a little label into the folds.
Optional Extras
-
Add a second bow or a flower motif.
-
Use variegated yarn for the border if you want a bit of whimsy.
-
Line the back with soft fabric for a plush finish (if you’re brave with the sewing machine).
Videos Tutorials:
Certainly! Here are some YouTube tutorials that demonstrate how to crochet a baby blanket using the waffle stitch pattern:
-
Crochet Easy Waffle Baby Blanket
This tutorial provides a step-by-step guide to creating a waffle stitch baby blanket, suitable for beginners. By Maisie and Ruth Channel
-
How to Crochet Waffle Stitch Baby Blanket (Pretty & EASY 2-row Repeat)
This video demonstrates a simple two-row repeat pattern to create a beautiful waffle stitch baby blanket. By Sirin’s Crochet Channel
-
How to Crochet the Waffle Stitch
In this tutorial, Bella Coco explains how to crochet the waffle stitch, which can be used to make items like dishcloths or baby blankets.
Feel free to watch these videos to get a visual understanding of the waffle stitch pattern and how to apply it to a baby blanket.