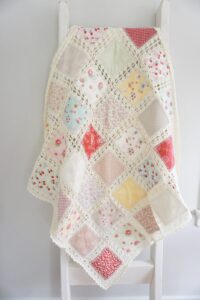
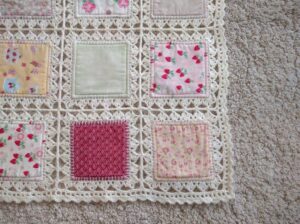
The High Tea Fusion Quilt is a stunning fusion of fabric and crochet, creating a timeless heirloom piece. Inspired by vintage tea parties and delicate lace, this quilt beautifully combines soft fabric squares with intricate crochet edging. It’s a perfect project for using leftover fabric scraps and yarn to create a cozy, elegant throw or baby blanket.
This pattern will guide you through the entire process, from fabric preparation to crochet borders and assembly.
Materials Needed
Fabric & Sewing Supplies
✔ Fabric Squares: 5” x 5” (charm pack or hand-cut)
✔ Cotton Batting: 4.5” x 4.5” (slightly smaller than fabric squares)
✔ Embroidery Needle: Large enough for embroidery floss
✔ Embroidery Thread or Perle Cotton: For the blanket stitch foundation
✔ Fabric Scissors or Rotary Cutter: For precise cutting
✔ Sewing Pins or Clips: To hold layers in place
Crochet Supplies
✔ Crochet Hook: 3.5mm (E) or 4mm (G)
✔ Yarn: Light or DK-weight cotton yarn (solid or variegated)
✔ Yarn Needle: For weaving in ends
Step 1: Preparing the Fabric Squares
-
Cut Fabric & Batting
- Cut fabric squares to 5” x 5” using a rotary cutter or scissors.
- Cut batting squares slightly smaller, around 4.5” x 4.5” to prevent bulk in the seams.
-
Assemble the Fabric Layers
- Sandwich the batting between two fabric squares with the right sides facing outward.
- Pin or clip the layers together to keep them aligned.
-
Sew a Blanket Stitch Around Each Square
- Using an embroidery needle and embroidery floss, sew a blanket stitch around all four edges of the square.
- Keep stitches evenly spaced (around ¼” apart) to create a sturdy foundation for crocheting.
Tip: Use a contrasting embroidery thread for a decorative effect or a matching color for a seamless look.

Step 2: Crocheting the Borders
Once all squares have a blanket stitch foundation, it’s time to crochet a decorative edge.
Foundation Row (Single Crochet Border)
- Attach yarn to any blanket stitch loop.
- Work 1 single crochet (sc) into each blanket stitch, keeping stitches even.
- At each corner, work (1 sc, ch 2, 1 sc) to maintain the square shape.
- Slip stitch to join, then fasten off.
Decorative Border Options
You can add a second-row using different border styles:
1. Simple Picot Edge (Lace-Like & Elegant)
(Best for delicate, vintage-style quilts)
- Ch 1, sc in first stitch, (ch 3, slip stitch into first ch to form picot, sc in next stitch), repeat around.
2. Shell Stitch Border (Classic & Textured)
(Great for a soft, scalloped look)
- Ch 3 (counts as first dc), work 4 dc in same stitch, skip 2 stitches, sc in next stitch, skip 2 stitches, repeat shell pattern around.
3. Granny Border (Vintage & Cozy)
- Ch 3, dc in same stitch, (skip 2 stitches, 2 dc in next stitch, ch 1, 2 dc in same stitch), repeat around.
Choose your favorite border style for each square to add variety or keep it uniform for a polished look!
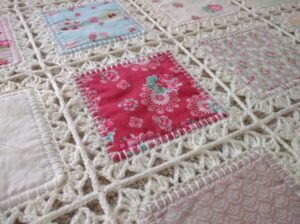
Step 3: Joining the Crochet Squares
Once all squares are bordered, you need to join them. Here are three joining techniques:
1. Slip Stitch Join (Invisible & Neat)
- Place two squares right sides together and slip stitch through back loops only to join them.
2. Whipstitch Join (Fast & Seamless)
- Using a yarn needle, sew the squares together with an invisible whipstitch.
3. Flat Braid Join (Lacy & Decorative)
(Great for openwork designs)
- Work ch 5, slip stitch into opposite square’s edge, ch 5, sc in next stitch to create a lacy effect.
Step 4: Adding a Final Border
After all squares are joined, crochet a final border around the entire quilt.
Elegant Border Options
✔ Simple Single Crochet – Work 1 sc in each stitch around for a clean look.
✔ Scalloped Edge – Work (sc, skip 1 stitch, 5 dc in next stitch, skip 1 stitch) around.
✔ Lace Edge – Work (sc, ch 5, skip 3, sc in next stitch) around.
This final touch enhances the quilt’s elegance and durability.
Care Instructions
- Hand wash or machine wash on delicate.
- Lay flat to dry to maintain shape.
- Gently block the quilt if needed to reshape the crochet.
Customization Ideas
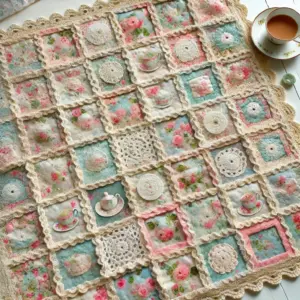
✔ Color Theme: Use vintage florals, pastels, or modern prints to match your style.
✔ Size Adjustments: Add more squares for a larger blanket or fewer for a small lap quilt.
✔ Yarn Choices: Use solid colors for a classic look or variegated yarn for a whimsical effect.
A Visual Treat:
For those who prefer a visual guide, Tiffany has graciously provided a video tutorial that walks you through the process:
Part 1: Fabric Squares
Part 2: Blanket Stitch
Part 3: Crocheting around the Squares
Part 4: Blocking & Joining the Squares
Part 5: Crocheting the Border
Tutorial and photos of this baby hoodie by: Tiffany Behmer
Conclusion
The High Tea Fusion Quilt is a timeless project that blends the softness of fabric with the intricate beauty of crochet. Whether you’re creating a cozy throw for your home, a baby blanket, or a cherished gift, this fusion quilt will be a treasured piece for years to come.
Would you like diagrams, stitch charts, or video tutorials for better guidance? Let me know! 😊 Happy crocheting! 🧶💖
